【数据结构与算法】手写HashMap的模拟实现
✨哈喽,进来的小伙伴们,你们好耶!✨
🛰️🛰️系列专栏:【数据结构与算法】
✈️✈️本篇内容:手写HashMap的模拟实现!
🚀🚀代码存放仓库gitee:Java数据结构代码存放!
⛵⛵作者简介:一名双非本科大三在读的科班Java编程小白,道阻且长,你我同行!
🚋🚋给大家推荐一个超级好用的刷题网站—牛客网!点击链接注册,开启刷题之路!

一、手写HashMap
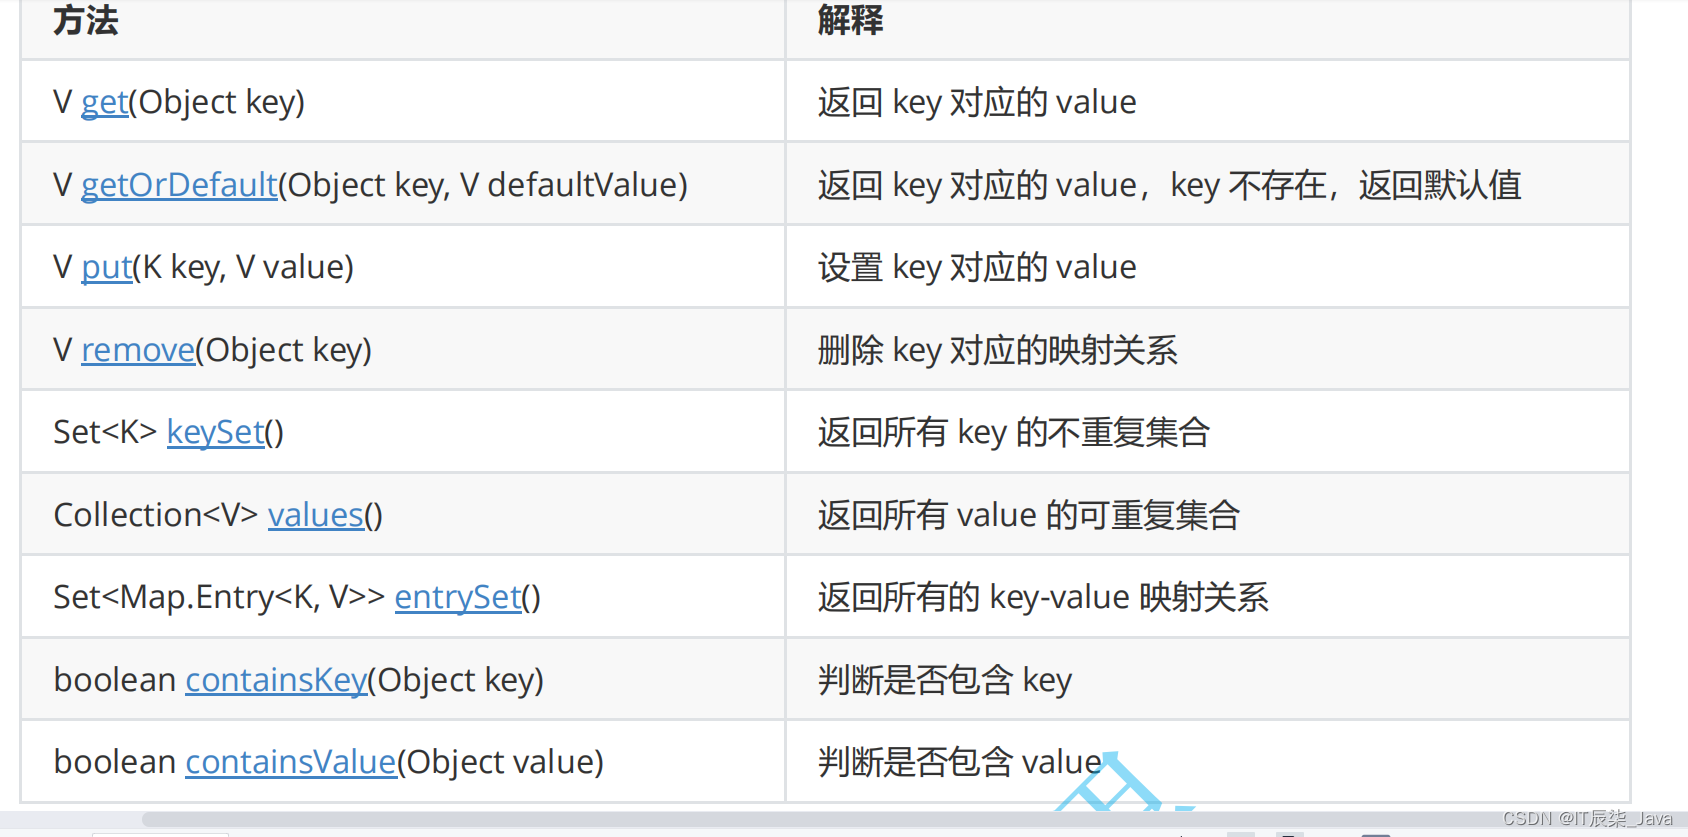
🎁1、Map的常用方法
🍊方法一(基本类型)
因为map的底层结构是数组,每个元素是一个链表,所以我们这里定义的数组是Node类型,定义一个usedSize代表数组中有多少个数据。
🍅1、内部类准备
static class Node {public int key;public int val;public Node next;public Node(int key, int val) {this.key = key;this.val = val;}}public Node[] array;public int usedSize;public HashBuck() {array = new Node[8];}🍎2、实现put以及头插法
首先假如我们要插入一个节点,那么我们首先需要找到这个节点,找到下标index,那么这里就涉及到头插和尾插法,JDK1.7默认是头插法,JDK1.8默认是尾插法,那么我们这里使用头插法来演示。
public void put(int key,int val) {int index = key % array.length;//遍历Index下标的数组,如果有相同的key那么替换Node cur = array[index];while (cur != null) {if(cur.key == key) {cur.val = val;return;}cur = cur.next;}//进行头插法Node node = new Node(key, val);node.next = array[index];array[index] = node;usedSize++;if( loadFactor() >= 0.75f) {resize();}}
🍏3、扩容函数resize
这里扩容不能仅仅将数组增大到二倍,因为扩容之后对应的节点下标会发生变化,所以这里需要重新哈希!需要注意的是我们将节点插入到新的下标之后,那么我们需要定义一个curNext来提前存储cur.next,不然当我们插入之后,链表就会断掉,找不到cur.next了。
private void resize() {Node[] newArray = new Node[2*array.length];for (int i = 0; i < array.length; i++) {Node cur = array[i];while (cur != null) {Node curNext = cur.next;int newIndex = cur.key % newArray.length;//拿着cur节点 进行插入到新的位置cur.next = newArray[newIndex];newArray[newIndex] = cur;cur = curNext;}}array = newArray;}🍋实验: 这里我们给出main函数代码,来测试一下我们的resize()函数是否有问题。
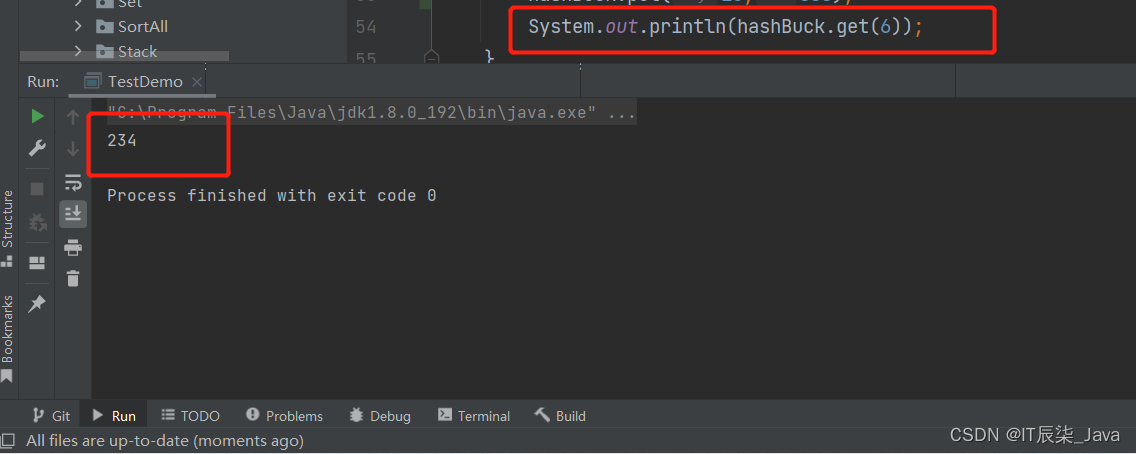
public static void main(String[] args) {HashBuck hashBuck = new HashBuck();hashBuck.put(1,6);hashBuck.put(2,7);hashBuck.put(3,8);hashBuck.put(4,54);hashBuck.put(5,66);hashBuck.put(6,234);hashBuck.put(15,888);System.out.println(hashBuck.get(6));}🍯这里我们给出的数组空间大小是8,那么已知负载因子是0.75,所以我们在第六个元素的位置打个断点, 来debug一下。
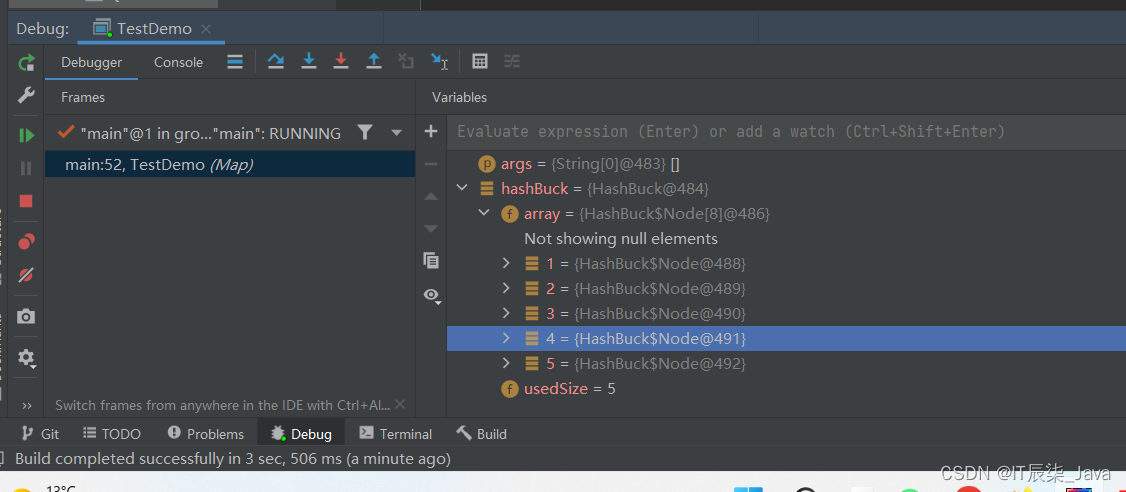
🍻 我们发现,元素的存储没有问题,那么点击上面那个蓝色往右下角偏移的箭头,代码会向下执行。
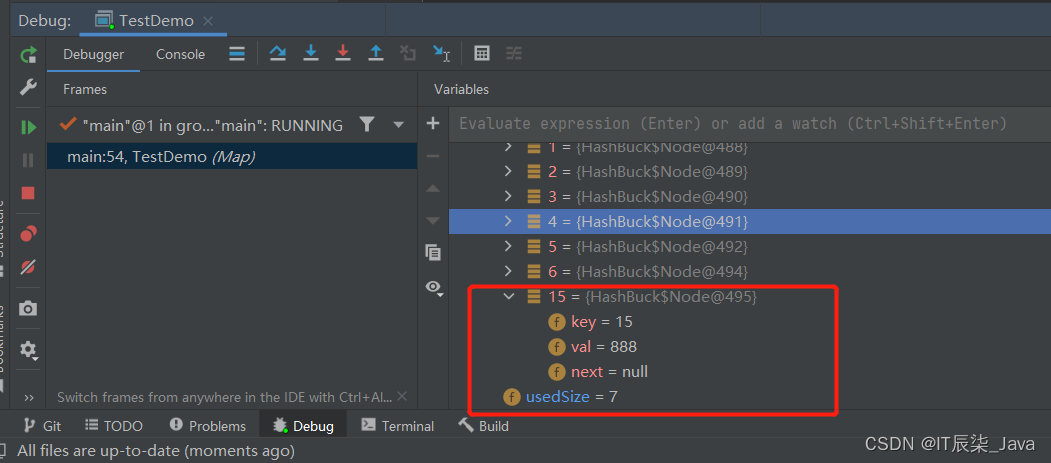
🍺OK,因为这里的15 % 16 = 15;所以15应该插在index为15的位置,usedsize = 7,没有问题。
🥞4、实现get方法
public int get(int key) {int index = key % array.length;Node head = array[index];while (head != null) {if(head.key == key) {return head.val;}head = head.next;}return -1;}🥘测试:
🍏方法二(引用类型)
那么我们知道Map的结构是
🍱1、内部类实现
static class Node {public K key;public V val;public Node next;public Node(K key, V val) {this.key = key;this.val = val;}}public Node[] array = (Node[])new Node[10];public int usedSize; 🍊2、实现put方法
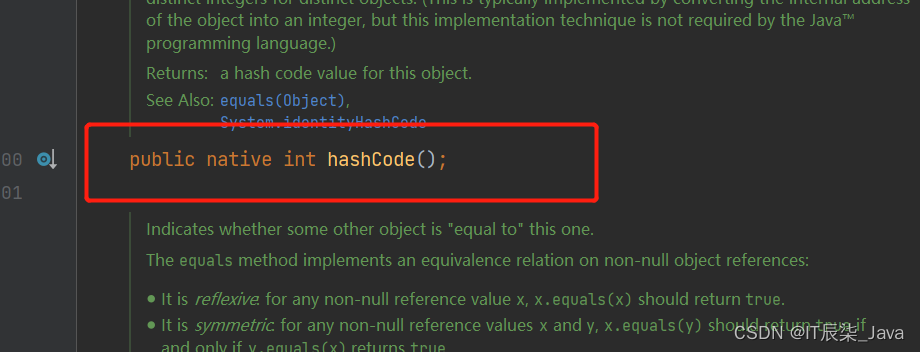
因为这里的key是引用类型不可以去%length,必须想办法转换为整型,那么这里就用到了我们的hashCode()方法,将引用类型转换为哈希码,再用hash%length。
 🍋代码实现:
public void put(K key,V val) {int hash = key.hashCode();int index = hash % array.length;Node cur = array[index];while (cur != null) {if(cur.key.equals(key)) {cur.val = val;return;}cur = cur.next;}Node node = new Node<>(key, val);node.next = array[index];array[index] = node;usedSize++;} 🥙3、测试类
那么注意,因为我们这里是使用的引用类型,那么必须重写hashCode()方法和equals()方法,hashCode()方法用来定位我们的数组下标,刚才有介绍过hashCode()方法是native int 类型的,equals()方法用来引用类型的比较,那么假如我们这里给一个成员变量id,那么这里我们来测试一下,重写hashCode()方法和equals()方法后:
   @Overridepublic boolean equals(Object o) {if (this == o) return true;if (o == null || getClass() != o.getClass()) return false;Person person = (Person) o;return Objects.equals(id, person.id);}@Overridepublic int hashCode() {return Objects.hash(id);}
}
public class TestDemo {public static void main(String[] args) {Person p1 = new Person("12345");Person p2 = new Person("12345");System.out.println(p1.hashCode());System.out.println(p2.hashCode());}
}
🌽运行结果:
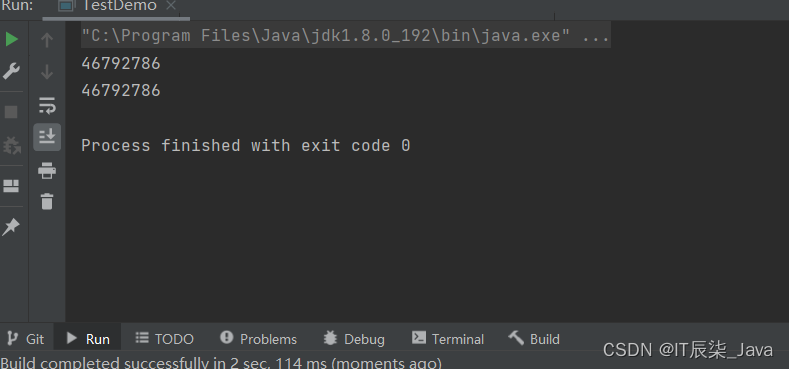
我们发现结果是正确的!
🍻4、实现get方法
public V get(K key) {int hash = key.hashCode();int index = hash % array.length;Node cur = array[index];while (cur != null) {if(cur.key.equals(key)) {return cur.val;}cur = cur.next;}return null;} 面试问题:
🚦1、两个对象的hashCode一样,equals一定一样吗? 不一定
🚦2、两个对象的equals一样,hashCode一定一样吗?一定
原因:
🍬🍬如果两个对象hashCode()相等,它们并不一定相等。因为在散列表中,hashCode()相等,即两个键值对的哈希值相等。然而哈希值相等,并不一定能得出键值对相等,此时就出现所谓的哈希冲突场景。
🍼🍼如果两个对象相等,那么它们的hashCode()值一定相同。这里的相等是指,通过equals()比较两个对象时返回true。
总结:
🛥️🛥️1、hashCode() 的作用是获取哈希码,也称为散列码;它实际上是返回一个int整数。这个哈希码的作用是确定该对象在哈希表中的索引位置。hashCode() 定义在JDK的Object.java中,这就意味着Java中的任何类都包含有hashCode() 函数。
⛵⛵2、equals它的作用也是判断两个对象是否相等,如果对象重写了equals()方法,比较两个对象的内容是否相等;如果没有重写,比较两个对象的地址是否相同,价于“==”。同样的,equals()定义在JDK的Object.java中,这就意味着Java中的任何类都包含有equals()函数。
