【Vue】我的尚品汇项目笔记---20230109~20230120
014之前可参考官方笔记
https://blog.csdn.net/weixin_43424325/article/details/121684101
015-axios二次封装
api/index.js 设定
//当前模块,API进行统一管理,即对请求接口统一管理
import requests from "@/api/request";//首页三级分类接口
export const reqgetCategoryList = () => {return  requests({url: '/product/getBaseCategoryList',method: 'GET'})
}
api/request.js 配置请求拦截器并开启进度条
import axios from "axios";//引入进度条
import nprogress from 'nprogress';
//引入进度条样式
import "nprogress/nprogress.css";//1、对axios二次封装
const requests = axios.create({//基础路径,requests发出的请求在端口号后面会跟改baseURlbaseURL:'/api',timeout: 5000,
})
//2、配置请求拦截器
requests.interceptors.request.use(config => {//config内主要是对请求头Header配置//比如添加token//开启进度条nprogress.start();return config;
})
//3、配置相应拦截器
requests.interceptors.response.use((res) => {//成功的回调函数//响应成功,关闭进度条nprogress.done()return  res.data;
},(error) => {//失败的回调函数console.log("响应失败"+error)return Promise.reject(new Error('fail'))
})
//4、对外暴露
export default requests;
main.js 测试api接口
import Vue from 'vue'
import App from './App.vue'
import VueRouter from 'vue-router'
import router from './router'
import TypeNav from './views/Home/TypeNav'
import store from './store'Vue.config.productionTip = falseVue.use(VueRouter)//第一个参数:全局组件名字,第二个参数:全局组件
Vue.component(TypeNav.name,TypeNav)//测试:发起请求
import {reqgetCategoryList} from './api'
reqgetCategoryList();new Vue({render: h => h(App),router,store
}).$mount('#app')
018-vuex模块式开发
TypeNav/index.vue 读取vuex数据
api/index.js 设定请求api
//当前模块,API进行统一管理,即对请求接口统一管理
import requests from "@/api/request";//首页三级分类接口
export const reqgetCategoryList = () => {return  requests({url: '/product/getBaseCategoryList',method: 'GET'})
}
store/homes.js设定三连环
import { reqgetCategoryList, } from "@/api";//home模块的仓库
const state = {//home仓库中存储三级菜单的数据categoryList: [],
};//mutions是唯一修改state的地方
const mutations = {GETCATEGORYLIST(state, categoryList) {state.categoryList = categoryList;},
};//action|用户处理派发action地方的,可以书写异步语句、自己逻辑地方
const actions = {async getCategoryList({ commit }) {//reqgetCategoryList返回的是一个Promise对象//需要用await接受成功返回的结果,await必须要结合async一起使用(CP)let result = await reqgetCategoryList();if (result.code == 200) {commit("GETCATEGORYLIST", result.data);}},
};//计算属性
const getters = {};export default {state,mutations,actions,getters,
};
019-026 三级联动数据
019-动态展示三级联动数据
TypeNav/index.vue 设定c1,c2,c3动态商品分类导航

020-完成三级联动动态背景
TypeNav/index.vue 设定index和currentIndex来启动cur class
{{ c1.categoryName }}

021-通过JS控制二三级
TypeNav/index.vue注释掉以下less后,用js来实现
&:hover {.item-list {display: block;}}
TypeNav/index.vue

025-三级联动节流
插件官网https://www.lodashjs.com/
npm i --save lodash
TypeNav/index.vue引用lodash的节流功能
026-三级联动路由跳转


方法1:TypeNav/index.vue使用
全部商品分类
name:'search',params:$route.params,query:{categoryName:c1.categoryName,category1Id:c1.categoryId,}}">{{ c1.categoryName }}
name:'search',params:$route.params,query:{categoryName:c2.categoryName,category2Id:c2.categoryId,}}">{{ c2.categoryName }} name:'search',params:$route.params,query:{categoryName:c3.categoryName,category3Id:c3.categoryId,}}">{{ c3.categoryName }}
方法2:TypeNav/index.vue使用编程式导航,内存消耗小。
事件委派问题:
(1)如何确定我们点击的一定是a标签呢?如何保证我们只能通过点击a标签才跳转呢?
(2)如何获取子节点标签的商品名称和商品id(我们是通过商品名称和商品id进行页面跳转的)
解决方法:
对于问题1:为三个等级的a标签添加自定义属性date-categoryName绑定商品标签名称来标识a标签(其余的标签是没有该属性的)。
对于问题2:为三个等级的a标签再添加自定义属性data-category1Id、data-category2Id、data-category3Id来获取三个等级a标签的商品id,用于路由跳转。
TypeNav/index.vue
全部商品分类
{{ c1.categoryName }}
- {{ c2.categoryName }}
{{ c3.categoryName }}
方法3:我重写了goSearch()方法
其实就是取出data标记的变量,然后用query去接收,用loction变量整合query和params参数,最后传给router。
goSearch(event) {//取变量let node = event.target.datasetlet loction = { name: "search" };let query = {'categoryName': node.categoryname,}if(node.category1id){query.category1Id = node.category1id}else if(node.category2id){query.category2Id = node.category2id}else{query.category3Id = node.category3id}//带参访问if (node.categoryname) {if (this.$route.params) {loction.params = this.$route.params;loction.query = query;this.$router.push(loction);}}},
029-Search模块中商品分类与过渡动画
商品分类
TypeNav/index.vue加上v-show=“show”、mounted()、leaveShow()、enterShow()


TypeNav/index.vue完整代码
全部商品分类
{{ c1.categoryName }}
- {{ c2.categoryName }}
{{ c3.categoryName }}
过渡动画
TypeNav/index.vue加上transition标签。

TypeNav/index.vue设定好less,记得.sort-enter需放在.container大括号里面。
//过渡动画的样式//过渡动画开始状态(进入).sort-enter {height: 0px;}// 过渡动画结束状态(进入).sort-enter-to {height: 461px;}// 定义动画时间、速率.sort-enter-active {transition: all 0.5s linear;}
030-typeNav商品分类列
typeNav商品分类列信息都是一样的,出于性能的考虑我们希望该数据只请求一次,所以我们把这次请求放在App.vue的mounted中。
将typeNav/index.vue的mount()改到App.vue的mount()。

App.vue增加mount()
031-合并参数
Header/index.vue仿照这一段把query参数带过去。
//判断:如果路由跳转的时候,带有params参数,捎带脚传递过去if (this.$route.params) {loction.params = this.$route.params;//动态给location配置对象添加query属性loction.query = query;//路由跳转this.$router.push(loction);}
Header/index.vue
![]()

032-mockjs模拟数据 & 033-尚硅谷-尚品汇-获取Banner轮播图数据
官网链接

第一步:安装依赖包mockjs
安装mockjs `npm install --save mockjs`
第二步:在src文件夹下创建一个文件夹mock。
第三步:准备模拟的数据。!
mock/banner.json
[{"id": "1","imgUrl": "/images/banner1.jpg"},{"id": "2","imgUrl": "/images/banner2.jpg"},{"id": "3","imgUrl": "/images/banner3.jpg"},{"id": "4","imgUrl": "/images/banner4.jpg"}
]
mock/floor.json
[{"id": "001","name": "家用电器","keywords": ["节能补贴","4K电视","空气净化器","IH电饭煲","滚筒洗衣机","电热水器"],"imgUrl": "/images/floor-1-1.png","navList": [{"url": "#","text": "热门"},{"url": "#","text": "大家电"},{"url": "#","text": "生活电器"},{"url": "#","text": "厨房电器"},{"url": "#","text": "应季电器"},{"url": "#","text": "空气/净水"},{"url": "#","text": "高端电器"}],"carouselList": [{"id": "0011","imgUrl": "/images/floor-1-b01.png"},{"id": "0012","imgUrl": "/images/floor-1-b02.png"},{"id": "0013","imgUrl": "/images/floor-1-b03.png"}],"recommendList": ["/images/floor-1-2.png","/images/floor-1-3.png","/images/floor-1-5.png","/images/floor-1-6.png"],"bigImg": "/images/floor-1-4.png"},{"id": "002","name": "手机通讯","keywords": ["节能补贴2","4K电视2","空气净化器2","IH电饭煲2","滚筒洗衣机2","电热水器2"],"imgUrl": "/images/floor-1-1.png","navList": [{"url": "#","text": "热门2"},{"url": "#","text": "大家电2"},{"url": "#","text": "生活电器2"},{"url": "#","text": "厨房电器2"},{"url": "#","text": "应季电器2"},{"url": "#","text": "空气/净水2"},{"url": "#","text": "高端电器2"}],"carouselList": [{"id": "0011","imgUrl": "/images/floor-1-b01.png"},{"id": "0012","imgUrl": "/images/floor-1-b02.png"},{"id": "0013","imgUrl": "/images/floor-1-b03.png"}],"recommendList": ["/images/floor-1-2.png","/images/floor-1-3.png","/images/floor-1-5.png","/images/floor-1-6.png"],"bigImg": "/images/floor-1-4.png"}
]
把mock数据需要的图片放置于public文件夹中

第四步:在mock文件夹中创建一个mockServe.js文件。
(注意:在server.js文件当中对于banner.json||floor.json的数据没有暴露,但是可以在server模块中使用。对于webpack当中一些模块:图片、json,不需要对外暴露,因为默认就是对外暴露。)
第五步:通过mock模块模拟出数据
mockServe.js
import Mock  from 'mockjs'
//webpack默认对外暴露:json、图片
import banner from './banner.json'
import floor from './floor.json'//mock数据:第一个参数请求地址、第二个参:请求数据
Mock.mock("/mock/banner",{code:200,data:banner})
Mock.mock("/mock/floor",{code:200,data:floor})
//记得要在main.js中引入一下
//import ''@/mock/mockServer
第六步:回到入口文件,引入serve.js。
import '@/mock/mockServe'

第七步:在API文件夹中创建mockRequest【axios实例:baseURL:‘/mock’】
1.api/mockAjax.js几乎跟request.js一模一样,默认暴露request,import时重命名为mockRequest。
import axios from "axios";//引入进度条
import nprogress from 'nprogress';
//引入进度条样式
import "nprogress/nprogress.css";//1、对axios二次封装
const requests = axios.create({//基础路径,requests发出的请求在端口号后面会跟改baseURlbaseURL:'/mock',timeout: 5000,
})
//2、配置请求拦截器
requests.interceptors.request.use(config => {//config内主要是对请求头Header配置//比如添加token//开启进度条nprogress.start();return config;
})
//3、配置相应拦截器
requests.interceptors.response.use((res) => {//成功的回调函数//响应成功,关闭进度条nprogress.done()return  res.data;
},(error) => {//失败的回调函数console.log("响应失败"+error)return Promise.reject(new Error('fail'))
})
//4、对外暴露
export default requests;
2.api/index.js暴露mock数据
//当前模块,API进行统一管理,即对请求接口统一管理
import requests from "@/api/request";
import mockRequests from "./mockAjax";//首页三级分类接口
export const reqgetCategoryList = () => {return  requests({url: '/product/getBaseCategoryList',method: 'GET'})
}//切记:当前函数执行需要把服务器返回结果返回
//获取banner(Home首页轮播图接口)
export const reqGetBannerList = () => mockRequests.get("/banner");
//获取floor数据
export const reqFloorList = () => mockRequests.get("/floor");
第八步:Vuex三连(actions、mutations、state)
store/home.js新增 async getBannerList()、GETBANNERLIST()、bannerList,新增 async getFloorList()、GETFLOORLIST()、floorList。
import { reqgetCategoryList,reqGetBannerList } from "@/api";//home模块的仓库
const state = {//home仓库中存储三级菜单的数据categoryList: [],//轮播图的数据bannerList: [],//floor组件的数据floorList:[]
};//mutions是唯一修改state的地方
const mutations = {GETCATEGORYLIST(state, categoryList) {state.categoryList = categoryList;},GETBANNERLIST(state, bannerList) {state.bannerList = bannerList;console.log('GETBANNERLIST')},GETFLOORLIST(state,floorList){state.floorList = floorList;}
};//action|用户处理派发action地方的,可以书写异步语句、自己逻辑地方
const actions = {async getCategoryList({ commit }) {//reqgetCategoryList返回的是一个Promise对象//需要用await接受成功返回的结果,await必须要结合async一起使用(CP)let result = await reqgetCategoryList();if (result.code == 200) {commit("GETCATEGORYLIST", result.data);}},async getBannerList({ commit }) {let result = await reqGetBannerList();if (result.code == 200) {commit("GETBANNERLIST", result.data);console.log('result.data',result.data)}},//获取floor数据async getFloorList({ commit }) {let result = await reqFloorList();if (result.code == 200) {//提交mutationcommit("GETFLOORLIST", result.data);console.log('result.data',result.data)}},
};//计算属性
const getters = {};export default {state,mutations,actions,getters,
};
第九步: 组件请求数据
ListContainer/index.vue 请求数据,用计算属性bannerList去接收数据。

034~036-Banner实现轮播图
【24、swiper插件实现轮播图】
官方做法请见https://blog.csdn.net/weixin_43424325/article/details/121684101中的【24、swiper插件实现轮播图】。
ElementUI轮播图用10行代码就能解决
链接https://element.eleme.cn/#/zh-CN/component/carousel
main.js全局引用ElementUI
//引入ElementUI组件库
import ElementUI from 'element-ui';
//引入ElementUI全部样式
import 'element-ui/lib/theme-chalk/index.css';
//使用ElementUI
Vue.use(ElementUI)
ListContainer/index.vue引用【Carousel 走马灯】

![]()
ListContainer/index.vue完整代码
![]()
尚品汇快报更多 >
- [特惠]备战开学季 全民半价购数码
- [公告]备战开学季 全民半价购数码
- [特惠]备战开学季 全民半价购数码
- [公告]备战开学季 全民半价购数码
- [特惠]备战开学季 全民半价购数码
- 话费
- 机票
- 电影票
- 游戏
- 彩票
- 加油站
- 酒店
- 火车票
- 众筹
- 理财
- 礼品卡
- 白条
![]()
最终效果:

037~038-动态展示Floor组件(ElementUI做轮播图)
1.获取floor组件mock数据
2.分析数据结构

3.动态展示Floor组件(ElementUI做轮播图)
Home/index.vue 里面有Floor组件,并用props传值。
Floor/index.vue 动态传值
{{ list.name }}
- {{ keyword }}
![]()
![]()
![]()
![]()
![]()
![]()
![]()
039-将轮播图模块提取为公共组件
1.编写公共组件
Carousel/index.vue
![]()
2.全局注册
main.js
import Carousel from '@/components/Carousel'
Vue.component(Carousel.name,Carousel)
3.组件内引用
Floor/index.vue
040~042-search模块中动态展现数据
API、vuex三连、mapstate、动态展现

api/index.js 根据接口文件,给服务器传递一个默认参数【至少是一个空对象】
//当前这个接口(获取搜索模块的数据),给服务器传递一个默认参数【至少是一个空对象】
export const reqGetSearchInfo = (params)=>requests({url:"/list",method:"post",data:params});
store/search.js我没有使用getters
computed:{...mapState({goodsList: (state)=> state.search.searchList.goodsList || [],attrsList: (state)=> state.search.searchList.attrsList,trademarkList: (state)=> state.search.searchList.trademarkList,})},
store/search.js
import { reqGetSearchInfo } from "@/api";//home模块的仓库
const state = {//仓库初始状态searchList:{}
};//mutions是唯一修改state的地方
const mutations = {REQGETSEARCHINFO(state, searchList) {state.searchList = searchList;},
};//action|用户处理派发action地方的,可以书写异步语句、自己逻辑地方
const actions = {async getSearchList({ commit },params={}) {let result = await reqGetSearchInfo(params);if (result.code == 200) {commit("REQGETSEARCHINFO", result.data);}},
};// 计算属性
const getters = {
};export default {state,mutations,actions,getters,
};
Search/index.vue 采取mapState,并动态展现数据
一些坑
1.POST请求数据,可能会请求数据延时,导致无法取得数据。
假如网络不给力或没有网state.searchList.goodsList应该返回的是undefined
2.goodsList写成goodslist
goodsList: (state)=> state.search.searchList.goodsList
044-Search模块中子组件(SearchSelector)动态展示

Search/SearchSelector/SearchSelector.vue
{{ attr.attrName }}
Vuex 数据结构


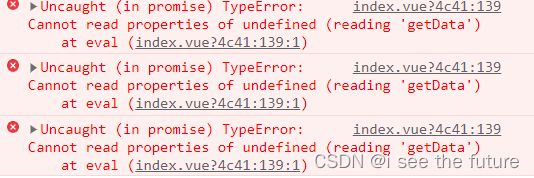
045-监听路由的变化再发请求获取数据
watch监听路由的变化再发请求获取数据
Search/index.vue
watch:{//监听路由的信息是否发生变化,如果发生变化,再次发起请求$route(newValue,oldValue){console.log(newValue)//每一次请求完毕,应该把相应的1、2、3级分类的id置空的,让他接受下一次的相应1、2、3//再次发请求之前整理带给服务器参数Object.assign(this.searchParams,this.$route.query,this.$route.params);this.getData()console.log(this.searchParams)//分类名字与关键字不用清理:因为每一次路由发生变化的时候,都会给他赋予新的数据this.searchParams.category1Id = undefined;this.searchParams.category2Id = undefined;this.searchParams.category3Id = undefined;//分类Season清掉// this.searchParams.categoryName = undefined;// this.searchParams.keyword = undefined;}}
坑:三个ID只能带一个
三个ID只能带一个,所以需要重置。分类名字与关键字不用清理:因为每一次路由发生变化的时候,都会给他赋予新的数据

//分类名字与关键字不用清理:因为每一次路由发生变化的时候,都会给他赋予新的数据this.searchParams.category1Id = undefined;this.searchParams.category2Id = undefined;this.searchParams.category3Id = undefined;//分类Season清掉this.searchParams.categoryName = undefined;this.searchParams.keyword = undefined;
046~049-面包屑

面包屑categoryName
Search\index.vue 把带给服务器的参数置空了,还需要向服务器发请求。undefined字段不会带给服务器。通过自己跳自己,删除query,保留params参数。
{{ searchParams.categoryName }}×

面包屑keyword
Search\index.vue 给服务器带的参数searchParams的keyword置空,还需要向服务器发请求。undefined字段不会带给服务器。全局路线总线通知兄弟组件Header清除关键字。通过自己跳自己,删除路径上的params,保留路径上的query参数。
{{ searchParams.categoryName }}×
全局路线总线通知Header/index.vue
mounted() {//通过全局事件总线清除关键字this.$bus.$on("clear", () => {this.keyword = "";});},

组件通信方式
第一种 父子组件通信:$ on、$emit自定义事件实现子组件给父组件传递信息。 props实现父组件给子组件传递数据。
第二种 全局事件总线 $bus(适用于所有的场景)
第三种 Vuex
第四种 插槽(适用于父子组件通信)
面包屑trademark
点击子组件SearchSelector商标时,父组件Search的数据重新发请求。
Search/SearchSelector/SearchSelector.vue给父组件传递参数。
{{ trademark.tmName }}
Search/index.vue删除品牌的信息,更新searchParams.trademark = undefined。采取自定义事件回调,再次发请求获取search模块列表数据进行展示。
{{ searchParams.trademark.split(':')[1] }}× 
面包屑props
点击子组件SearchSelector属性时,父组件Search的数据重新发请求。
Search/SearchSelector/SearchSelector.vue给父组件传递参数。
{{ attrValue }}
Search/index.vue采取自定义事件回调,根据所选择的属性,再次发请求获取search模块列表数据进行展示。也可以删除属性,更新this.searchParams.props.splice(index, 1)。
{{ attrValue.split(":")[1] }}×

050~051-排序
排序的逻辑比较简单,只是改变一下请求参数中的order字段,后端会根据order值返回不同的数据来实现升降序。
order属性值为字符串,例如‘1:asc’、‘2:desc’。1代表综合,2代表价格,asc代表升序,desc代表降序。
我们的升降序是通过箭头图标来辨别的,如图所示:

Search/index.vue
1.在search模块使用该图标
2.isOne、isTwo、isAsc、isDesc计算属性代码
computed:{...isOne(){return this.searchParams.order.indexOf('1') !== -1},isTwo(){return this.searchParams.order.indexOf('2') !== -1},isAsc(){return this.searchParams.order.indexOf('asc') !== -1},isDesc(){return this.searchParams.order.indexOf('desc') !== -1},},
3.点击‘综合’或‘价格’的触发函数changeOrder
//排序的操作changeOrder(flag) {//flag:用户每一次点击li标签的时候,用于区分是综合(1)还是价格(2)//现获取order初始状态【咱们需要通过初始状态去判断接下来做什么】let originOrder = this.searchParams.order;let orginsFlag = originOrder.split(":")[0];let originSort = originOrder.split(":")[1];//新的排序方式let newOrder = "";//判断的是多次点击的是不是同一个按钮if (flag == orginsFlag) {newOrder = `${orginsFlag}:${originSort == "desc" ? "asc" : "desc"}`;} else {//点击不是同一个按钮newOrder = `${flag}:${"desc"}`;}//需要给order重新赋值this.searchParams.order = newOrder;//再次发请求this.getData();},
字符串拼接
如果你想在你的字符串内加入某个变量的值,就需要字符串拼接使用 ``(飘符号),由于 飘在markdown是单行代码标记所以下面我们用··代替。
字符串拼接 ·${}·,使用方法如下:
在js中使用
var a = 1;
console.log(`a的值是:${a}`); //a的值是:1
在html中使用
052~058-分页器
先查看Vuex/search返回数组情况

官方笔记
实际开发中是不会手写的,一般都会用一些开源库封装好的分页,比如element ui。但是这个知识还是值得学习一下的。
核心属性:pageNo(当前页码)、pageSize、total、continues(连续展示的页码)
核心逻辑是获取连续页码的起始页码和末尾页码,通过计算属性获得。(计算属性如果想返回多个数值,可以通过对象形式返回)
当点击页码会将pageNo传递给父组件,然后父组件发起请求,最后渲染。这里还是应用通过自定义事件实现子组件向父组件传递信息。
Pagination/index.vue
//连续页码的起始页码、末尾页码startNumAndEnd(){let start = 0 , end = 0;//规定连续页码数字5(totalPage至少5页)//不正常现象if(this.continues > this.totalPage){start = 1end = this.totalPage}else{//正常现象 Math.floor:想下取整start = this.pageNo - Math.floor(this.continues/2)end = this.pageNo + Math.floor(this.continues/2)//start出现不正常现象纠正if(start < 1){start = 1end = this.continues}//end出现不正常现象纠正if(end > this.totalPage){end = this.totalPagestart = this.totalPage - this.continues + 1}}return {start,end}}ElementUI的分页器

Pagination/index.vue使用ElementUI的分页器,简单很多。
Search\index.vue传入分页器所需内容,并注册getPageNo自定义事件。
main.js:Pagination注册为全局组件。
import Pagination from '@/components/Pagination'
Vue.component(Pagination.name,Pagination)
059-滚动条
使用前端路由,当切换到新路由时,想要页面滚到顶部,或者是保持原先的滚动位置,就像重新加载页面那样。 vue-router 能做到,而且更好,它让你可以自定义路由切换时页面如何滚动。
https://router.vuejs.org/zh/guide/advanced/scroll-behavior.html
router/index.js
// 向外默认暴露路由器对象
export default new VueRouter({mode: 'history', // 没有#的模式routes, // 注册所有路由scrollBehavior(to, from, savedPosition) {// 始终滚动到顶部return { y: 0 }},})
undefined细节(*****)
访问undefined的属性值会引起红色警告,可以不处理,但是要明白警告的原因。
以获取商品categoryView信息为例,categoryView是一个对象。
对应的getters代码
const getters =  {categoryView(state){return state.goodInfo.categoryView}
}
对应的computed代码
computed:{...mapGetters(['categoryView'])}
html代码
{{categoryView.category1Name}}{{categoryView.category2Name}}{{categoryView.category3Name}}
注意下细节在于getters的返回值。如果getters按上面代码写为return state.goodInfo.categoryView,页面可以正常运行,但是会出现红色警告。

原因:假设我们网络故障,导致goodInfo的数据没有请求到,即goodInfo是一个空的对象,当我们去调用getters中的return state.goodInfo.categoryView时,因为goodInfo为空,所以也不存在categoryView,即我们getters得到的categoryView为undefined。所以我们在html使用该变量时就会出现没有该属性的报错。
即:网络正常时不会出错,一旦无网络或者网络问题就会报错。
总结:所以我们在写getters的时候要养成一个习惯在返回值后面加一个||条件。即当属性值undefined时,会返回||后面的数据,这样就不会报错。如果返回值为对象加||{},数组:||[ ]。此处categoryView为对象,所以将getters代码改为return state.goodInfo.categoryView||{}
060~068 产品详情Detail
路由的坑
1.接口文档说明:参数是params的skuId。

2.router/routes.js
{path:'/detail/:skuId',//params参数需要占位component:Detail,meta:{showFooter: true,}},
3.Search/index.vue
![]()
4.api/index.js
//产品详情
export const reqGoodsInfo = (skuId)=>requests({url:`/item/${skuId}`,method:"get"});
取得数据
1.api已经写了。
2.vuex三连
store/detail.js
import { reqgetCategoryList,reqGetBannerList,reqFloorList,reqGoodsInfo } from "@/api";//仓库
const state = {goodInfo: {},
};//mutions是唯一修改state的地方
const mutations = {GETGOODINFO(state, goodInfo) {state.goodInfo = goodInfo;},
};//action|用户处理派发action地方的,可以书写异步语句、自己逻辑地方
const actions = {async getGoodInfo({ commit },skuId) {//reqgetCategoryList返回的是一个Promise对象//需要用await接受成功返回的结果,await必须要结合async一起使用(CP)let result = await reqGoodsInfo(skuId);if (result.code == 200) {commit("GETGOODINFO", result.data);}},
};//计算属性
const getters = {};export default {state,mutations,actions,getters,
};
3.组件取得数据
Detail/index.vue
展示图片/数据

Detail/index.vue展示部分数据(面包屑、价格、商品名称、商品详情)
{{ goodInfo.categoryView.category1Name }}{{ goodInfo.categoryView.category2Name }}{{ goodInfo.categoryView.category3Name }}{{ goodInfo.skuInfo.skuName }}
{{ goodInfo.skuInfo.skuDesc }}
价 格¥{{ goodInfo.skuInfo.price }}降价通知累计评价65545促 销加价购满999.00另加20.00元,或满1999.00另加30.00元,或满2999.00另加40.00元,即可在购物车换购热销商品支 持以旧换新,闲置手机回收 4G套餐超值抢 礼品购配 送 至广东省 深圳市 宝安区轮播图互动
老师的方法很巧妙:在轮播图组件中设置一个currendIndex,用来记录所点击图片的下标,并用currendIndex实现点击图片高亮设置。当符合图片的下标满足currentIndex===index时,该图片就会被标记为选中。

ImageList.vue用ElementUI实现轮播图
![]()
Zoom.vue 展示照片
![]()
![]()
添加放大镜(难)

zoom.vue添加handler,使用big和mask。
![]()
![]()


单纯放大镜zoom的插件(可单独使用)
单纯zoom的插件 zoom2.vue
![]()
![]()
显示属性
使用spuSaleAttrList数据。

Detail/index.vue动态展现属性
- {{ spuSaleAttr.saleAttrName }}
- {{ spuSaleAttrValue.saleAttrValueName }}
computed:{...mapState({goodInfo: (state) => state.detail.goodInfo,})},

Detail/index.vue选择数量和输入值校对

排他操作
数据结构

Detail/index.vue遍历全部售卖属性值isChecked为零没有高亮了,点击的那个售卖属性值变为1
- {{ spuSaleAttr.saleAttrName }}
- {{ spuSaleAttrValue.saleAttrValueName }}
methods: {changeActive(saleAttrValue, arr){arr.forEach(function (item, index) {//遍历全部售卖属性值isChecked为零没有高亮了item.isChecked = 0})//点击的那个售卖属性值变为1saleAttrValue.isChecked = 1console.log(saleAttrValue.saleAttrValueName)},},

069-073 加入购物车
API接口说明

api/index.js
//加入购物车 /api/cart/addToCart/{ skuId }/{ skuNum }
export const reqAddOrUpdateShopCart = (skuId,skuNum)=>requests({url:`/cart/addToCart/${skuId}/${skuNum}`,method:"post"});
直接发请求并路由跳转(没必要vuex储存数据)

Detail/index.vue调用api后,根据返回状态直接进行路由跳转,不用去vuex三连。(下面那个params参数skuId只是试验我会传参,是要删掉的)
router/routes.js设置params参数占位(记得删掉占位skuId)
{path:'/AddCartSuccess/:skuId?',name:'AddCartSuccess',component:AddCartSuccess,meta:{showFooter: true,}},
query无法带走所有参数,需使用本地存储
当我们想要实现两个毫无关系的组件传递数据时,首相想到的就是路由的query传递参数,但是query适合传递单个数值的简单参数,所以如果想要传递对象之类的复杂信息,就可以通过Web Storage实现。
sessionStorage:为每一个给定的源维持一个独立的存储区域,该区域在页面会话期间可用(即只要浏览器处于打开状态,包括页面重新加载和恢复)。
localStorage:同样的功能,但是在浏览器关闭,然后重新打开后数据仍然存在。
注意:无论是session还是local存储的值都是字符串形式。如果我们想要存储对象,需要在存储前JSON.stringify()将对象转为字符串,在取数据后通过JSON.parse()将字符串转为对象。
Detail/index.vue将数据存储在本地。
async addShopcar(skuId,skuNum){//直接发请求let result = await reqAddOrUpdateShopCart(skuId,skuNum)console.log('result',result)if (result.code == 200){// 本地存储sessionStorage.setItem('GOODINFO',JSON.stringify(this.goodInfo))// 路由跳转this.$router.push({name:'AddCartSuccess',query:{'skuNum':skuNum}})// console.log(this.$route)}else{alert('error')}}
AddCartSuccess/index.vue读取本地存储并展现。

回退查看查看商品详情 和
AddCartSuccess/index.vue
查看商品详情
也可以这样写
查看商品详情
跳转购物车结算
AddCartSuccess/index.vue
去购物车结算 >

073-075 购物车之一:获取购物车列表
API接口

如果没有uuidToken,返回数据为空
但是如果想要获取详细信息,还需要一个用户的uuidToken,用来验证用户身份。但是该请求函数没有参数,所以我们只能把uuidToken加在请求头中。

加入uuidToken
创建utils工具包文件夹,创建生成uuid的js文件,对外暴露为函数(记得导入uuid => npm install uuid)。
生成临时游客的uuid(随机字符串),每个用户的uuid不能发生变化,还要持久存储。
utils/uuid_token.js
import {v4 as uuidv4} from 'uuid'
//生成临时游客的uuid(随机字符串),每个用户的uuid不能发生变化,还要持久存储
export const getUUID = () => {//1、判断本地存储是否由uuidlet uuid_token = localStorage.getItem('UUIDTOKEN')//2、本地存储没有uuidif(!uuid_token){//2.1生成uuiduuid_token = uuidv4()//2.2存储本地localStorage.setItem("UUIDTOKEN",uuid_token)}//当用户有uuid时就不会再生成return uuid_token
}
用户的uuid_token定义在store中的detail模块
const state = {goodInfo:{},//游客身份uuid_token: getUUID()
}
在request.js中设置请求头
import store from '@/store';
requests.interceptors.request.use(config => {//config内主要是对请求头Header配置//1、先判断uuid_token是否为空if(store.state.detail.uuid_token){//2、userTempId字段和后端统一config.headers['userTempId'] = store.state.detail.uuid_token}//比如添加token//开启进度条nprogress.start();return config;
})
注意this.$store只能在组件中使用,不能再js文件中使用。如果要在js中使用,需要引入import store from ‘@/store’;

购物车商品信息展示

ShopCart/index.vue动态展示数据,增加小计和总价。
调整产品选中状态(every函数使用)
every遍历某个数组,判断数组中的元素是否满足表达式,全部为满足返回true,否则返回false
例如判断底部勾选框是否全部勾选代码部分
//判断底部勾选框是否全部勾选isAllCheck() {//every遍历某个数组,判断数组中的元素是否满足表达式,全部为满足返回true,否则返回falsereturn this.cartInfoList.every(item => item.isChecked === 1)}
全选

076-077 购物车之二:购物车的商品数量变动
复用加入购物车的API
重点是,API商品数量是变动值(+100),不就是最终数量(105)。

api/index.js
//加入购物车 /api/cart/addToCart/{ skuId }/{ skuNum }
export const reqAddOrUpdateShopCart = (skuId,skuNum)=>requests({url:`/cart/addToCart/${skuId}/${skuNum}`,method:"post"});
用handler函数处理数量变动(直接发请求,不用vuex)
ShopCart/index.vue注意看校对输入值部分。handler函数有三个参数,type区分操作,disNum用于表示数量变化(正负),cart商品的信息。
-+
async handler(type,disNum,cartInfo){if(type == 'minus'){cartInfo.disNum > 0 ? disNum = -1 : disNum = 0}else if(type == 'add'){disNum = 1}else{// 检验disNum输入值是否合法(isNaN(disNum) || disNum < 1)? disNum = 0 : disNum = parseInt(disNum) - cartInfo.skuNum}//直接发请求let result = await reqAddOrUpdateShopCart(cartInfo.skuId,disNum)console.log('result',result)if (result.code == 200){this.getData()}else{alert('error')}}
修改产品数据时,实时发请求。


加入节流throttle
ShopCart/index.vue
import throttle from 'lodash/throttle';methods: {handler:throttle(async function(type,disNum,cartInfo){if(type == 'minus'){cartInfo.disNum > 0 ? disNum = -1 : disNum = 0}else if(type == 'add'){disNum = 1}else{// 检验disNum输入值是否合法(isNaN(disNum) || disNum < 1)? disNum = 0 : disNum = parseInt(disNum) - cartInfo.skuNum}//直接发请求let result = await reqAddOrUpdateShopCart(cartInfo.skuId,disNum)console.log('result',result)if (result.code == 200){this.getData()}else{alert('error')}},1000)}
078 购物车之三:删除购物车的商品
删除购物车的商品的API
重点是:delete请求

api/index.js
//删除购物车单个商品 /api/cart/deleteCart/{skuId}
export const reqDeleteCartById = (skuId)=>requests({url:`/cart/deleteCart/${skuId}`,method:"DELETE"});
用函数处理删除购物车的商品(有bug)
ShopCart/index.vue
删除
移到收藏

因网速原因,删除可能不及时。
用函数处理删除购物车的商品(没有bug)
链接
办法就是去掉[0],并使用默认值。
ShopCart/index.vue
shop.js
import { reqCartList } from "@/api";//home模块的仓库
const state = {//仓库初始状态cartList:[],
};//mutions是唯一修改state的地方
const mutations = {GETCARTLIST(state, cartList) {state.cartList = cartList;},
};//action|用户处理派发action地方的,可以书写异步语句、自己逻辑地方
const actions = {async getCartList({ commit }) {let result = await reqCartList();if (result.code == 200) {commit("GETCARTLIST", result.data);}},
};// 计算属性
const getters = {cartList(state) {return state.cartList[0] || {}},
};export default {state,mutations,actions,getters,
};

079 购物车之四:修改购物车的商品状态
修改购物车的商品的API
重点是:其实不太懂为什么商品状态还有分选中不选中?

api/index.js
//修改购物车商品选中状态 /api/cart/checkCart/{skuID}/{isChecked}
export const reqUpdateCheckedByid = (skuId,isChecked)=>requests({url:`/cart/checkCart/${skuId}/${isChecked}`,method:"get"});
用函数处理产品状态的变更
ShopCart/index.vue将event事件中的值传给方法。

081 购物车之五:删除全部选中商品
删除购物车的商品的API【复用删除单个商品的API】
删除全部选中商品(有bug)
ShopCart/index.vue循环删除单个商品。this.getData()要放在循环外面。
删除
点击【删除选中的商品】


因网速原因,删除可能不及时。
bug:多于2个可正常删除后,剩下最后一栏无法删除会出现bug。

删除全部选中商品(没有bug)
办法就是使用mapGetter去掉[0],并使用默认值。
ShopCart/index.vue
shop.js
import { reqCartList } from "@/api";//home模块的仓库
const state = {//仓库初始状态cartList:[],
};//mutions是唯一修改state的地方
const mutations = {GETCARTLIST(state, cartList) {state.cartList = cartList;},
};//action|用户处理派发action地方的,可以书写异步语句、自己逻辑地方
const actions = {async getCartList({ commit }) {let result = await reqCartList();if (result.code == 200) {commit("GETCARTLIST", result.data);}},
};// 计算属性
const getters = {cartList(state) {return state.cartList[0] || {}},
};export default {state,mutations,actions,getters,
};

082 购物车之六:全部产品的勾选状态修改
全部产品的勾选状态修改的API【复用勾选单个商品的API】
全部产品的勾选状态修改(有bug)
全选//选中全部商品async updateAllCartChecked(e,cartInfoList){let isChecked = e.target.checked? '1':'0'cartInfoList.forEach(async function(element){let result = await reqUpdateCheckedByid(element.skuId,isChecked)console.log('updateChecked',result)if (result.code == 200) {return "ok";} else {return Promise.reject(new Error("faile"));}})console.log('this',this)this.getData()},

全部产品的勾选状态修改(没有bug)
方法就是写在computed里面,不要写在methods里面。
0" @click="updateAllCartChecked($event,cartInfoList)">全选computed:{//判断底部复选框是否勾选【全部产品都选中,采勾选】isAllCheck() {//遍历数组里面原理,只要全部元素isChecked属性都为1===>真 true//只要有一个不是1======>假falselet result = this.cartInfoList.every((item) => item.isChecked == 1)console.log('isAllCheck',result)return result},

ES6 const新用法
const {comment,index,deleteComment} = this
上面的这句话是一个简写,最终的含义相当于:
const comment = this.comment
const index = this.index
const deleteComment = this.deleteComment
083-089 登录和注册
083-085 注册
静态页面
![在这里插入图片描述]()

Register/index.vue
- 关于我们
- 联系我们
- 联系客服
- 商家入驻
- 营销中心
- 手机尚品汇
- 销售联盟
- 尚品汇社区
地址:北京市昌平区宏福科技园综合楼6层京ICP备19006430号
Login/index.vue
API:获取验证码、注册用户

![在这里插入图片描述]()
api/index.js
//获取注册验证码 /api/user/passport/sendCode/{phone}
export const reqGetCode = (phone)=>requests({url:`/user/passport/sendCode/${phone}`,method:"get"});//获取注册验证码 /api/user/passport/register
export const reqUserRegister = ({phone,password,code})=>requests({url:`user/passport/register`,method:"post",data:{phone,password,code}});
函数处理:获取验证码、注册用户(关键点在于参数的格式{phone,password,code})
Register/index.vue
- 关于我们
- 联系我们
- 联系客服
- 商家入驻
- 营销中心
- 手机尚品汇
- 销售联盟
- 尚品汇社区
地址:北京市昌平区宏福科技园综合楼6层京ICP备19006430号

store/user.js
import { reqGetCode,reqUserRegister } from "@/api";//home模块的仓库
const state = {phone:'',code: '',password:'',agree:'',
};//mutions是唯一修改state的地方
const mutations = {GETCODE(state, code) {state.code = code;},
};//action|用户处理派发action地方的,可以书写异步语句、自己逻辑地方
const actions = {async getCode({ commit },phone) {let result = await reqGetCode(phone);if (result.code == 200) {commit("GETCODE", result.data);}},async UserRegister({ commit },{phone,password,code}) {let result = await reqUserRegister({phone,password,code});console.log('vuex UserRegister',result)if (result.code == 200) {return "ok";}},
};//计算属性
const getters = {};export default {state,mutations,actions,getters,
};

注册功能就返回ok,并跳转到登录页面

086-088 登录
API接口:登录

api/index.js
//用户登录 /api/user/passport/login
export const reqUserLogin = ({phone,password})=>requests({url:`user/passport/login`,method:"post",data:{phone,password}});
函数处理:用户登录(登录成功后跳转home页)
Login/index.vue关键点在于参数{phone,password}
store/user.js
import { reqGetCode,reqUserRegister,reqUserLogin } from "@/api";//home模块的仓库
const state = {phone:'',code: '',password:'',agree:'',nickName:'',name:'',token:'',
};//mutions是唯一修改state的地方
const mutations = {GETCODE(state, code) {state.code = code;},USERLOGIN(state, data) {state.nickName = data.nickName;state.name = data.name;state.token = data.token;},
};//action|用户处理派发action地方的,可以书写异步语句、自己逻辑地方
const actions = {async getCode({ commit },phone) {let result = await reqGetCode(phone);if (result.code == 200) {commit("GETCODE", result.data);}},async UserRegister({ commit },{phone,password,code}) {let result = await reqUserRegister({phone,password,code});console.log('vuex UserRegister',result)if (result.code == 200) {return "ok";}},async UserLogin({ commit },{phone,password}) {let result = await reqUserLogin({phone,password});console.log('vuex UserLogin',result)if (result.code == 200) {commit("USERLOGIN", result.data);return "ok";}},};//计算属性
const getters = {};export default {state,mutations,actions,getters,
};
登录成功的截图

API接口:获取用户登录信息

api/index.js
//获取用户信息【需要带着用户的token向服务器要用户信息】
//URL:/api/user/passport/auth/getUserInfo method:get
export const reqUserInfo = ()=>requests({url:'/user/passport/auth/getUserInfo',method:'get'});
获取用户登录信息
store/user.js储存数据(UserLogin之setToken(result.data.token), getUserInfo获取用户信息)
import { reqGetCode,reqUserRegister,reqUserLogin,reqUserInfo } from "@/api";
import {setToken,getToken,removeToken } from "@/utils/token"//仓库
const state = {code: '',token: getToken(),userInfo: {},
};//mutions是唯一修改state的地方
const mutations = {GETCODE(state, code) {state.code = code;},USERLOGIN(state, token) {state.token = token;},GETUSERINFO(state, userInfo) {state.userInfo = userInfo;},
};//action|用户处理派发action地方的,可以书写异步语句、自己逻辑地方
const actions = {async getCode({ commit },phone) {let result = await reqGetCode(phone);if (result.code == 200) {commit("GETCODE", result.data);}},async UserRegister({ commit },{phone,password,code}) {let result = await reqUserRegister({phone,password,code});console.log('vuex UserRegister',result)if (result.code == 200) {return "ok";}},async UserLogin({ commit },{phone,password}) {let result = await reqUserLogin({phone,password});console.log('vuex UserLogin',result)if (result.code == 200) {commit("USERLOGIN", result.data.token);//持久化存储tokensetToken(result.data.token);return "ok";}},//获取用户信息async getUserInfo({ commit }) {let result = await reqUserInfo();console.log('getUserInfo',result)if (result.code == 200) {//提交用户信息commit("GETUSERINFO", result.data);return 'ok';}else{return Promise.reject(new Error('faile'));}},// 退出登录// async userLogout({commit}) {// //只是向服务器发起一次请求,通知服务器清除token// let result = await reqLogout();// //action里面不能操作state,提交mutation修改state// if(result.code==200){// commit("CLEAR");// return 'ok';// }else{// return Promise.reject(new Error('faile'));// }// },
};//计算属性
const getters = {};export default {state,mutations,actions,getters,
};
utils/tokens.js定义token的存储、获取、消除方法
//存储token
export const setToken = (token) => {localStorage.setItem("TOKEN", token);
};
//获取token
export const getToken = () => {return localStorage.getItem("TOKEN");
};//清除本地存储的token
export const removeToken=()=>{localStorage.removeItem("TOKEN");
}
发请求,读取数据
Home/index.vue在mounted时自动读取用户信息。
Header展示数据:userName()
请登录 免费注册
request.js带请求头token,否则请求失败。
//需要携带token带给服务器if(store.state.user.token){config.headers.token = store.state.user.token;}
效果
未带请求头token,发生208错误

带请求头token,用户验证成功


bug:跳出了home组件就会失去登录信息
解法1:将读取用户信息放在公共组件
App.vue在mounted时读取用户信息
mounted(){this.$store.dispatch('getUserInfo');},
解法2:路由守卫
089 退出登录
API:退出登录

api/index.js
//退出登录
//URL:/api/user/passport/logout  get
export const reqLogout = ()=> requests({url:'/user/passport/logout',method:'get'});
函数实现退出登录
1.帮仓库中先关用户信息清空
2.本地存储数据清空
utils/tokens.js定义token的存储、获取、消除方法
//存储token
export const setToken = (token) => {localStorage.setItem("TOKEN", token);
};
//获取token
export const getToken = () => {return localStorage.getItem("TOKEN");
};//清除本地存储的token
export const removeToken=()=>{localStorage.removeItem("TOKEN");
}
vuex三连
import { reqGetCode,reqUserRegister,reqUserLogin,reqUserInfo,reqLogout } from "@/api";
import {setToken,getToken,removeToken } from "@/utils/token"//仓库
const state = {code: '',token: getToken(),userInfo: {},
};//mutions是唯一修改state的地方
const mutations = {//清除本地数据CLEAR(state){//帮仓库中先关用户信息清空state.token = '';state.userInfo={};//本地存储数据清空removeToken();}
};//action|用户处理派发action地方的,可以书写异步语句、自己逻辑地方
const actions = {//获取用户信息async getUserInfo({ commit }) {let result = await reqUserInfo();console.log('getUserInfo',result)if (result.code == 200) {//提交用户信息commit("GETUSERINFO", result.data);return 'ok';}else{return Promise.reject(new Error('faile'));}},// 退出登录async userLogout({commit}) {//只是向服务器发起一次请求,通知服务器清除tokenlet result = await reqLogout();//action里面不能操作state,提交mutation修改stateif(result.code==200){commit("CLEAR");return 'ok';}else{return Promise.reject(new Error('faile'));}},
};//计算属性
const getters = {};export default {state,mutations,actions,getters,
};
Header组件定义退出方法logout()
![]()
效果

112-尚品汇-尚硅谷-nginx反向代理


我的实践(windows)
1.打包 npm run build

2.下载nginx
https://blog.csdn.net/GyaoG/article/details/124081770
3.拷贝打包文件到nginx

4.修改nginx配置nginx.conf
#user  nobody;
worker_processes  1;#error_log  logs/error.log;
#error_log  logs/error.log  notice;
#error_log  logs/error.log  info;#pid        logs/nginx.pid;events {worker_connections  1024;
}http {include       mime.types;default_type  application/octet-stream;#log_format  main  '$remote_addr - $remote_user [$time_local] "$request" '#                  '$status $body_bytes_sent "$http_referer" '#                  '"$http_user_agent" "$http_x_forwarded_for"';#access_log  logs/access.log  main;sendfile        on;#tcp_nopush     on;#keepalive_timeout  0;keepalive_timeout  65;#gzip  on;server {listen       5005;server_name  localhost;#charset koi8-r;#access_log  logs/host.access.log  main;location / {root   demo/static;index  index.html index.htm;}location /api {proxy_pass   http://gmall-h5-api.atguigu.cn;}#error_page  404              /404.html;# redirect server error pages to the static page /50x.html#error_page   500 502 503 504  /50x.html;location = /50x.html {root   html;}# proxy the PHP scripts to Apache listening on 127.0.0.1:80##location ~ \.php$ {#    proxy_pass   http://127.0.0.1;#}# pass the PHP scripts to FastCGI server listening on 127.0.0.1:9000##location ~ \.php$ {#    root           html;#    fastcgi_pass   127.0.0.1:9000;#    fastcgi_index  index.php;#    fastcgi_param  SCRIPT_FILENAME  /scripts$fastcgi_script_name;#    include        fastcgi_params;#}# deny access to .htaccess files, if Apache's document root# concurs with nginx's one##location ~ /\.ht {#    deny  all;#}}# another virtual host using mix of IP-, name-, and port-based configuration##server {#    listen       8000;#    listen       somename:8080;#    server_name  somename  alias  another.alias;#    location / {#        root   html;#        index  index.html index.htm;#    }#}# HTTPS server##server {#    listen       443 ssl;#    server_name  localhost;#    ssl_certificate      cert.pem;#    ssl_certificate_key  cert.key;#    ssl_session_cache    shared:SSL:1m;#    ssl_session_timeout  5m;#    ssl_ciphers  HIGH:!aNULL:!MD5;#    ssl_prefer_server_ciphers  on;#    location / {#        root   html;#        index  index.html index.htm;#    }#}}
5.关闭并重新打nginx
https://blog.csdn.net/weixin_42116703/article/details/127482331

6.效果

我的实践(ubuntu)
1.打包 npm run build
2.下载nginx
sudo apt-get install nginx
3.拷贝打包文件到虚拟机,不用在nginx文件夹中

4.sudo vim修改nginx配置default
1.sudo vim修改nginx配置default
season@ZHS-190213650:/$ ls
bin   dev  home  lib    lib64   lost+found  mnt  proc  run   snap  sys  usr
boot  etc  init  lib32  libx32  media       opt  root  sbin  srv   tmp  var
season@ZHS-190213650:/$ cd etc
season@ZHS-190213650:/etc$ cd nginx
season@ZHS-190213650:/etc/nginx$ ls
conf.d        fastcgi_params  koi-win     modules-available  nginx.conf    scgi_params      sites-enabled  uwsgi_params
fastcgi.conf  koi-utf         mime.types  modules-enabled    proxy_params  sites-available  snippets       win-utf
season@ZHS-190213650:/etc/nginx$ cd sites-available
season@ZHS-190213650:/etc/nginx/sites-available$ sudo vim
[sudo] password for season:
season@ZHS-190213650:/etc/nginx/sites-available$ sudo vim sites-available
season@ZHS-190213650:/etc/nginx/sites-available$ ls
default  sites-available
season@ZHS-190213650:/etc/nginx/sites-available$ sudo vim default
2.Vim指令https://blog.csdn.net/dotdotyy/article/details/120108308
若权限不足,则用sudo vim打开default。

3.default配置(个人觉得配置用windows那一版也可以)
server {listen 5005  default_server;#listen [::]:80 default_server;# SSL configuration## listen 443 ssl default_server;# listen [::]:443 ssl default_server;## Note: You should disable gzip for SSL traffic.# See: https://bugs.debian.org/773332## Read up on ssl_ciphers to ensure a secure configuration.# See: https://bugs.debian.org/765782## Self signed certs generated by the ssl-cert package# Don't use them in a production server!## include snippets/snakeoil.conf;#root /var/www/html;root /home/season/myseason/myfile/dist/static;# Add index.php to the list if you are using PHPindex index.html index.htm index.nginx-debian.html;server_name _;location / {# First attempt to serve request as file, then# as directory, then fall back to displaying a 404.try_files $uri $uri/ =404;}location /api {proxy_pass http://gmall-h5-api.atguigu.cn;}# pass PHP scripts to FastCGI server##location ~ \.php$ {#	include snippets/fastcgi-php.conf;##	# With php-fpm (or other unix sockets):#	fastcgi_pass unix:/var/run/php/php7.4-fpm.sock;#	# With php-cgi (or other tcp sockets):#	fastcgi_pass 127.0.0.1:9000;#}# deny access to .htaccess files, if Apache's document root# concurs with nginx's one##location ~ /\.ht {#	deny all;#}
}# Virtual Host configuration for example.com
#
# You can move that to a different file under sites-available/ and symlink that
# to sites-enabled/ to enable it.
#
#server {
#	listen 80;
#	listen [::]:80;
#
#	server_name example.com;
#
#	root /var/www/example.com;
#	index index.html;
#
#	location / {
#		try_files $uri $uri/ =404;
#	}
#}
5.关闭并重新打nginx
sudo service nginx restart
6.效果(有bug)
很多时候导航列表无法带出,有时候可以带出。不知道bug在哪?
